 |
OK, here is where we start... you've got your stock gauge cluster sitting in your dash.... |
| Open the hood and locate the upper speedo cable. In this photo, you can see the water bottle on the lower left. Some VWs do not have a 2 piece speedo cable though. |  |
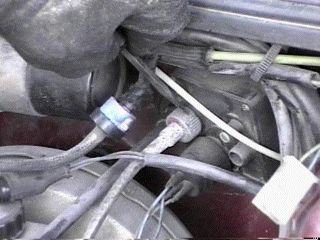 |
Here I've removed the watter bottle (it pulls right out) and you can see where the lower speedo cable runs into that black box. You will be unscrewing the upper part of the speedo cable only. If your "OXS" light is on in your dash, push in the reset button on that little black box. In this photo you can see the coil just below my hand (in dirty work glove). |
| And poof, here is the upper speedo cable. The reason you want to do this is so that you can get some slack on the other end of it (which is connected to the gauge cluster). | 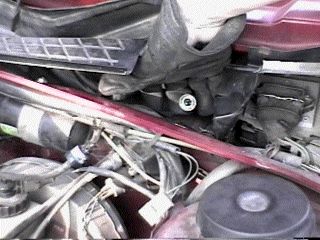 |
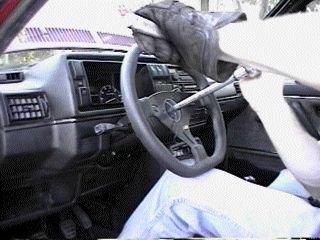 |
Get all comfy in your seat, then remove the center piece from your steering wheel. It pops right out on most cars. You may need a screw driver to help. Once you get that out of the way, you will see a 24mm nut that holds the steering wheel on a shaft. Remove the 24mm nut. The steering wheel will now pull right off. |
| Remove the dummy switches from your dash... just pull on the top of them and they pop right out. | 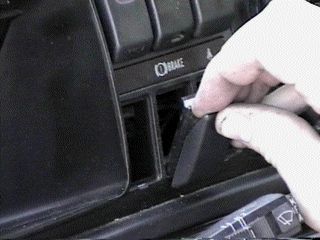 |
 |
You may need to start removing some screw that hold the plastic trim in place around your dash. On my dead 85 GTi, it didn't have screws above the gauge cluster, but rather snapped in place. On my 86 Jetta GLI, there are 2 screws right above the gauge cluster. Look carefully at your, you will find them....... |
| ......you'll find a screw behind the dummy switches, the headlights switch,....... | 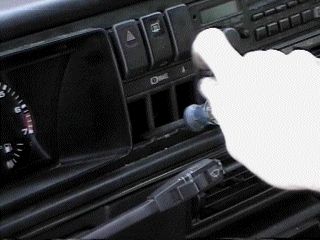 |
 |
.....behind the climate control. To remove it, center the 2 slide controls and then pull them out. Next, grasp the top part of the climate control and pull down/out on it to unsnap it. |
| And of course behind the radio. On most factory VW radios, you can remove it with a small screw driver. You insert it into one of the 4 holes that are located at the outer corners. Gently pull on the radio, insert the screw driver into the hole and that will "unhook" that corner. Repeat until you free the radio. If you have an aftermarket radio, you may want to seek help on pulling out the deck. Don't email me asking how to remove a Sony ES-101MDR 8track.. I don't know. | 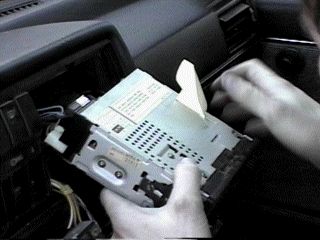 |
 |
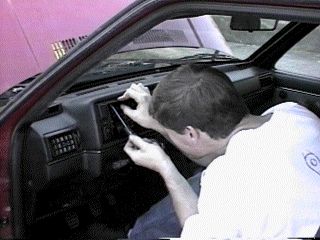
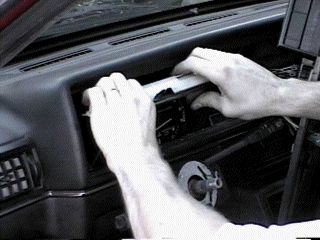
Now that you've remove all the screws that hold in the plastic trim, rotate the left side upward to get it out of the way. |
| There are 2 screws that hold the gauge cluster in most VWs. Simple remove them. Some A1s I recall have 4 screws. | 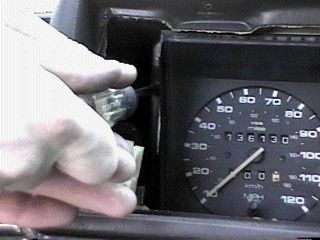 |
 |
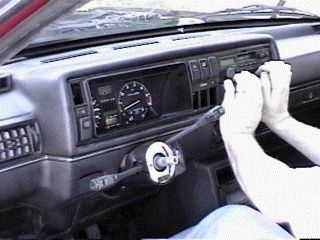
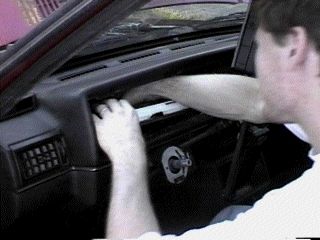
Now grasp the top of the gauge cluster and wiggle to towards you. You are wanting to make a gap to where you can reach your hands over the top of the gauge cluster. |
| Here is the other end of the upper speedo cable. By pressing the tab it will unhook and can be pulled free of the gauge cluster. | 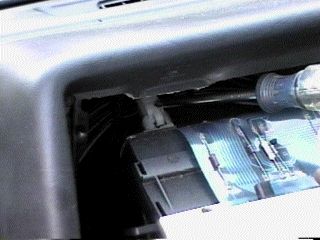 |
 |
Now for the hardest part, removing a vacum line that is plugged into the back of the gauge cluster... you just got to pull it free. |
| Once you get the speedo cable and that vacum line free, you can pull the gauge cluster out futher and unplug the wiring harness that is is plugged into it. Do not pull on the wires, but the plastic part that they run into! Some cars will have 2 harnesses running into it, while others will just have 1 harness. | 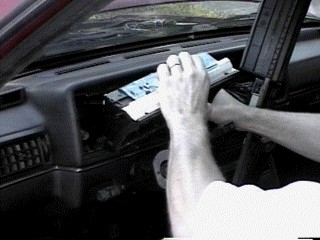 |
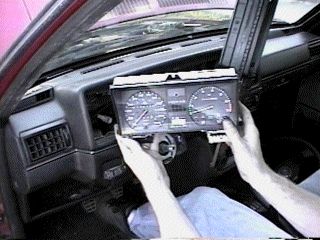 |
And with the wiring harness removed, you've got the gauge cluster out! This took me about 10 minutes to do from start to finish. Now you are ready to install a set of gauge overlays! |
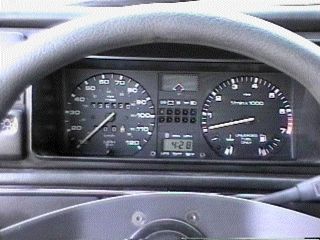
| Putting in the gauge cluster is just the reverse of taking it out. Just be careful to not drop a screw down into the dash. Here is the end results of my Jetta. I've painted the needles and the dummy idiot lights red, and notice how the redline is on the tach, instead of a red band, I made the markings red. |  |

Why should you send a postcard? Because it is cheap to do and as we all know, the US Post Office is funding it's Super Muntant Army Project with fees from postcards stamps. I would really like to see a Super Muntant Army deliever my mail in the near future.
Thank you.
