
Struts
Whatever the reasons, sooner or later you will be replacing the struts on your VW, and you might even be putting some new springs in as well. Detailed here is what you need to know in order to remove and install strut units. This will not go into detail on working with the springs.
The amount of energy stored in the springs when they are installed on the struts is very dangerous, and not having the correct tools can result in serious pain. Because of this, I suggest having the springs removed or installed onto struts done by your local automotive shop. Performance or bone stock, the job will be the same.
Never trust a jack with your life. Jacks fail without warning. If you are going to stick your body under a car, you use jackstands, it is that simple.
Please note that your car may vary from my car, so some things will be a little different, but over all, it is the same for any given VW
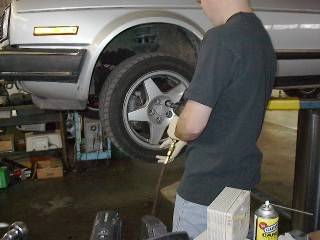 |
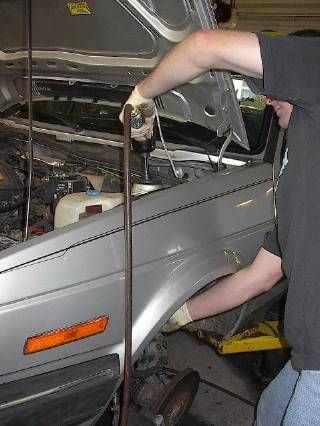
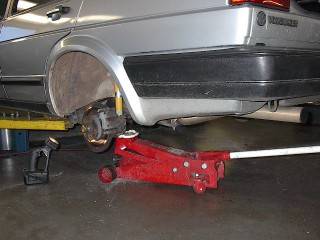
OK, here is my wife's 86 Jetta (count the lugs nuts). This car was in major need of new struts. We got it safely up in the air and I'm pulling the front rims off. |
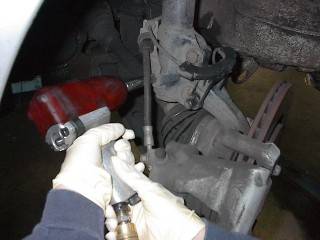
| Remove the bolt that holds the brake line bracket in place. And if the car has ABS brakes, remove the bracket for the ABS harness as well. |
 |
 |
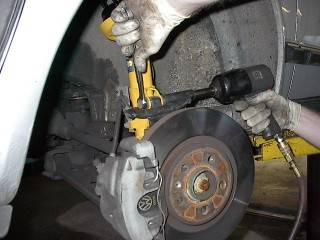
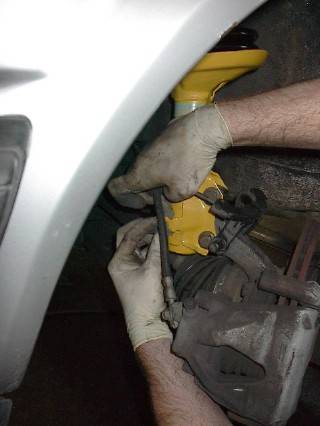
Now for the meat of things. There are 2 bolts at the bottom of the struts, remove them and set aside. |
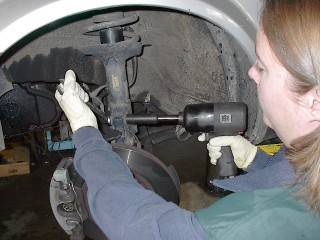
| Once you have the 2 bolts out, you will be able to the bearing asm out of the strut. |
 |
 |
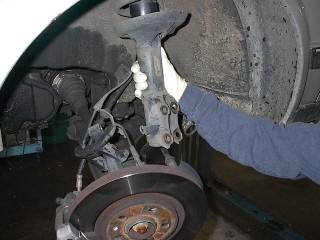
Unlike most other cars, the bearing plates of the struts are not bolted to the inner fender, but rather wedged in place when the car is on the ground. What keeps the struts from falling out when ou lift the car is a metal dish. While holding onto the strut asm, remove the 22mm nut and pull you will be able to work the strut out from the wheel well. |
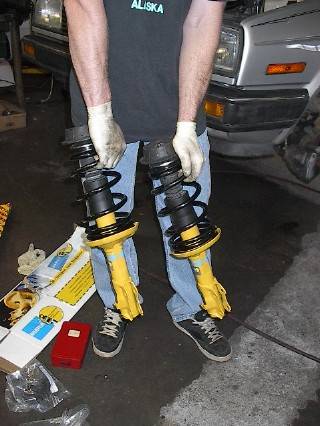
| In my Wife's case, we have new struts, new spring, new strut bearings. I was able to put everything together ahead of time. When you do struts, install new German made strut bearings! Some turner shops will sell strut asm like this already put together so you just bolt them up. |
 |
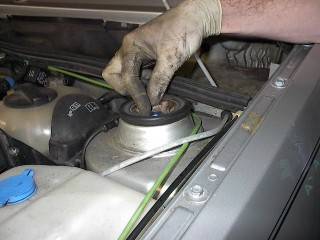 |
This is one of the harder parts if you are doing the job by yourself. Work the strut back into the wheel well and hold it in place with one hand and with the other hand put the metal dish onto the strut shaft and then get the new started. Allow strut holding arm to rest... |
| Fit the bearing asm into your new strut and get the bolts pushed in. I had to use a hammer to help get the bolts all the way though. Tighten down the bolts. |
 |
 |
Bolt the brake line bracket back up and snap the ABS harness into place and that is all there is to doing the front struts. Lets move on to the rear struts. |
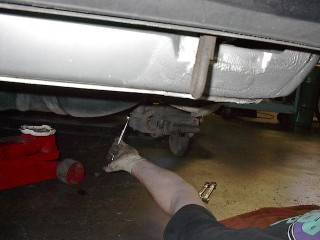
| Remove the bolt that is at the bottom of the rear strut. These bolts tend to be eaten up by rust, so take a good look at them and replace them if they look like rust is killing them. |
 |
 |
There are 2 ways to get the top of the struts undone, and both of them suck. This is the less to take apart method. However, getting to the nuts on top of the struts is a pain. We can't get a wrench on it, so we put a socket on the nut, then use some Vise Grip pliers to turn the socket. Slow going... |
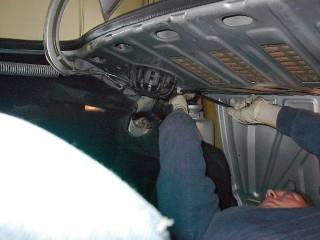
| And this is the "...ta Hell with this..." method. It involves your to remove the backrest of the rear seat, pull the cover or the rear tray up and then you can slap that Mac Tools 3/8" impact gun to it and remove those nuts really fast. I would suggest this way. Now you can remove the old struts. |
 |
 |
Pop the new struts into place. Bolt the lower part of the strut up first, then carefully use a floor jack to raise the asm up until the top of the strut is in place, then bolt it in place. That is it, you are done. |
Put your wheels back on and go get an alignment.
Click here to vote for my site if you find the info useful. Thank you.

All Step-By-Steps use Postcard-ware fees, if you find the info useful, then please send a postcard to:
4130 Products
740 Schenley Rd
Knoxville, TN 37923
Why should you send a postcard? Because it is cheap to do and as we all know, the US Post Office is funding it's Super Muntant Army Project with fees from postcards stamps. I would really like to see a Super Muntant Army deliever my mail in the near future.
Thank you.
