Some of the tools that you will need are as follows.....
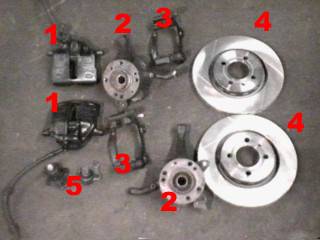
Here are the parts from a Corrado you will need to have on hand to make your swap.
|
 |
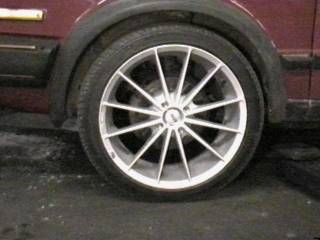 |
Here we are at the start, there is a lot of empty space in those 17" Konig Elan wheels. |
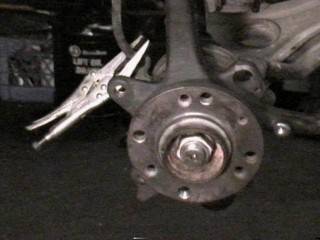
| Once I have the wheel off, you can see the plain old discs brake setup. Now we are ready to get into the meat of things. | 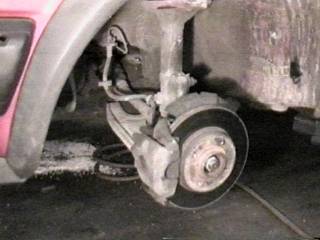 |
 |
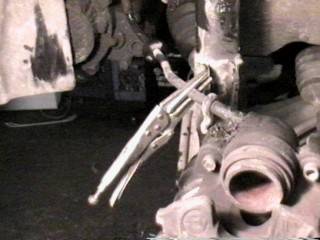
For this upgrade, we will be taking the knuckle asm off, remove the 2 bolts at the base of the strut, and the nut that hold the outer tie rod end to the knuckle as well. You may have to take a hammer and give the knuckle a few hits to help free that outer tie rod end. NEVER hit the tie rod end itself or you can damage it. Also remove the nut on the end of the CV joint. You may want to remove that before you lift the car by having a friend step on the brakes while you use a socket and cheater bar to remove it. (See CV boot/Axle replacement to see how I did it when I replaced a CV boot. |
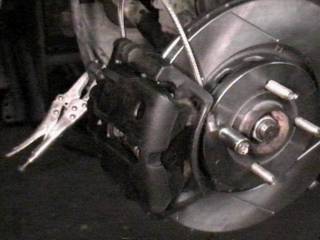
| Now that we have undone the strut and tie rod end from the knuckle, lets undo the caliper. | 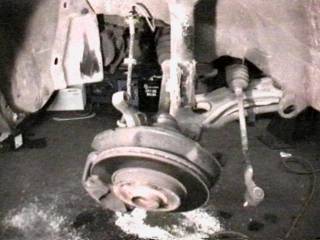 |
 |
I've taken my line lock tool (I know, it is a cheap pair of needle nose "vice grips" that I got from Sears for $2.99 a pop, then rounded out the jaws so they don't cut into a brake hose) and clamped off the rubber hose. Now undo the hose from the caliper to get it out of the way. By clamping the hose off, you won't leak brake fluid all over the floor. |
| Now remove the 3 bolts that hold the lower ball joint in place. Once you do this, you can slide the knuckle asm right out and you are left with your bare control arm. Some lower ball joints will have rivets in them and you will have to drill or chisel them out before you can pull the lower ball joint from the control arm. If that is the case, then I would remove the knuckle asm from the ball joint to give you more room to work with. Also note that the holes are elongated to allow for some camber adjustment. | 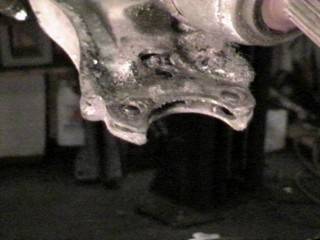 |
 |
As you can see, I just left the ball joint in the knuckle asm, I did however save the nut and bolt that clamped the knuckle to the ball joint. So far it has been an easy trip. Now we are ready to install the new brake system. |
| For the 11" brake set up, I needed to replace the lower ball joint because the stud on a G60 ball joint is larger than the stud on a Jetta GLI in my case. Slip it into the lower control arm and torque the bolts down. Simple so far. | 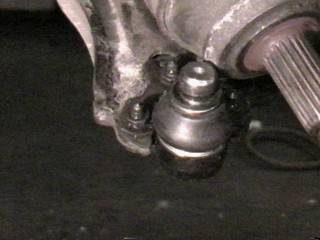 |
 |
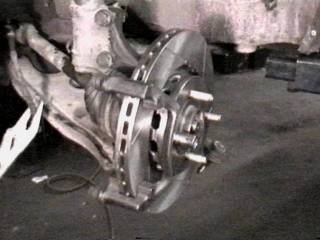
Now we install the "new" knuckle asm. Pop the CV joint through the hub, then the knuckle onto the ball joint, then the 2 bolts thought the lower part of the strut. I am going to leave the tie rod off for now and install it last. |
| Now I slip the rotor onto the hub. The Konig Elan wheels use "tuner style" lug nuts, so I have to have wheel studs on my car. They simply thread into the hub and are held in place with some thread lock. There is a little unthreaded ring on them so you can only put them into the hub so far and a hex opening on the ends of them to tighten them down. Notice that I'm using a lug to hold the rotor in place. You do not need that pain in the @$$ to remove screw. Looking good already. | 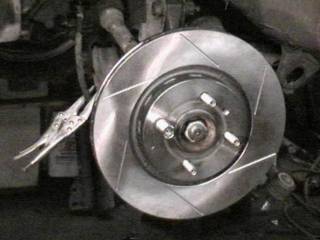 |
 |
Now bolt on the brake bridge. Once I got that bolted on I put a little bit of the silicon paste on the bridge where the brake pads make contact. |
| This is one of the brake pads, the black thing on it is a shim that helps keep the brakes from squeeling. It simply sticks to the back of the brake pad. Then I put some silicon paste on the shim as well to help even more. Those shims can really stop an annoying squeel. | 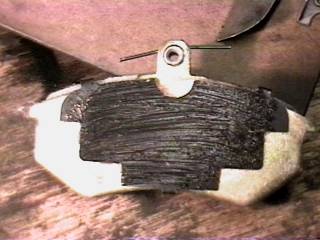 |
 |
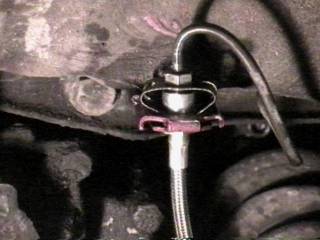
So I slip the pad into the bridge and then bolt my caliper up over it. Since I am putting in new brake lines as well, I've gone ahead and put one end into the caliper first. If you aren't going to replace your brake hoses, then shame on you! Any way, you are now ready to remove the other end of the OEM brake hose..... |
| ... with one of these little wrenches. Flaired wrenches can be picked up at most auto part stores and are a MUST HAVE TOOL if you don't want to round off the little nuts on the brake lines. Sometimes you have to spray a little WD-40 on them to help get them loose due to rust. At any rate, if you are going to use the OEM hose, then undo the end at the metal line, then install the other end into the caliper, then redo the end at the metal hose. This is so you don't twist the hose up. Since I used new hoses, I just remove the old.... | 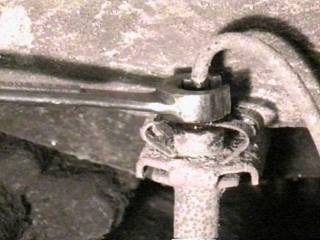 |
 |
... and hooked up the new one. Pretty easy. |
| Put that outer tie rod end back into the knuckle and tighten it down, and there it is. Now repeat on the other side them bleed the brakes. Since I was installing the new hoses, I installed them as well then did a complete flush and fill on the brake, that is, I changed the brake fluid because old brake fluid can screw up your system. | 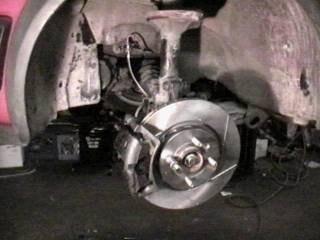 |

Why should you send a postcard? Because it is cheap to do and as we all know, the US Post Office is funding it's Super Muntant Army Project with fees from postcards stamps. I would really like to see a Super Muntant Army deliever my mail in the near future.
Thank you.
